Install Diode Drive on Windows
 Updated
Follow the three steps below to get up and running on Windows.
Download
Download Diode Drive for Windows.
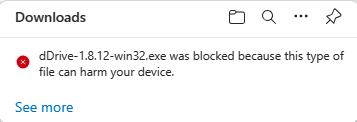
Some browsers (e.g. Edge) will warn you that the file may be dangerous because it is a ".exe" file - click "See more":
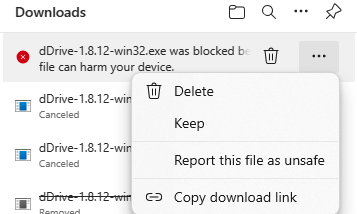
And then click the file again and then click the three dots and then click "Keep" and the click "Open File" to launch it:
Install and run Diode Drive
If the installation hasn't been launched, locate the downloaded installer file in your Downloads directory and double click it to launch the instaler.
On some Windows configuration, you will be warned about Windows Defender protecting your PC:
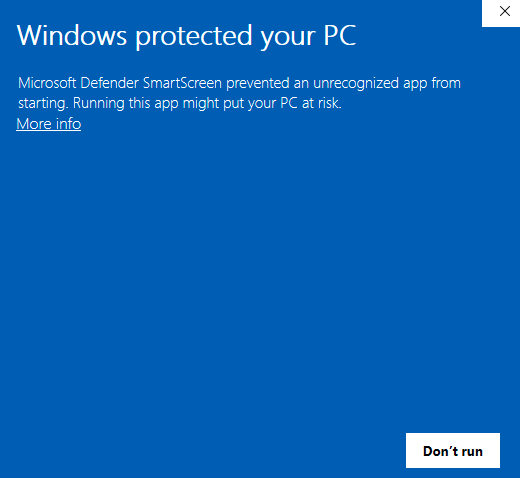
If you get this, click "More Info", which will change the screen to:
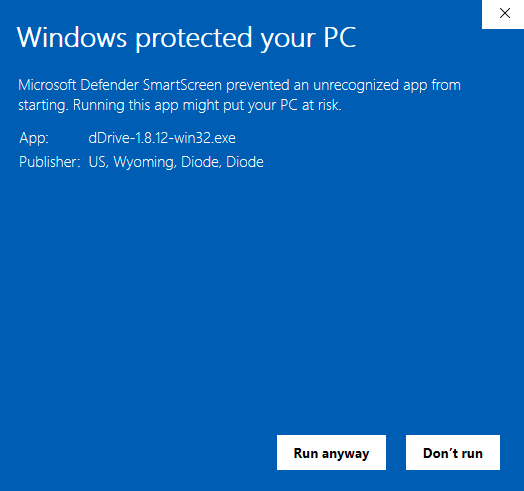
And then click "Run anyway"
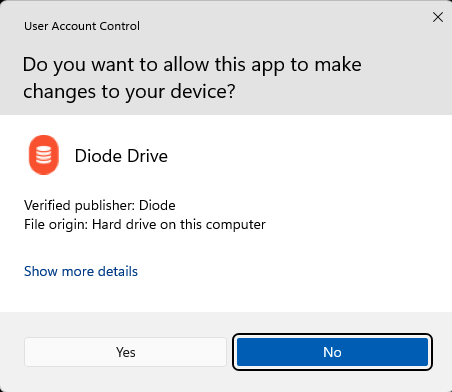
You'll be shown a User Account Control screen to verify you want to install - click "Yes":
And then follow the installation process to the end by clicking "Next" etc...:

Once installed, double click "Diode Drive" in the start menu to run it.
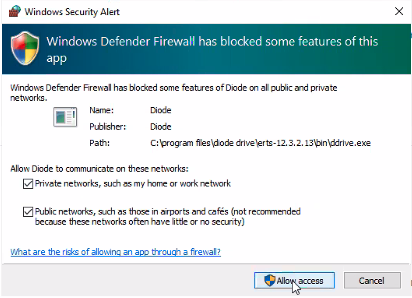
Some systems may show a firewall warning. If so, click "Allow access".
NOTE: You must have Microsoft Edge installed because the Diode Drive application UI requires "Webview"
Verify Diode Drive is running
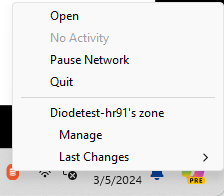
When Diode Drive starts up, it will load as a small orange icon in the task bar:

Clicking the orange Diode Drive icon will drop-down / pop-up menu options. Click "Open" to open the app.
That's it! Diode Drive is installed and active on your system.
NEXT STEP: Create an Account
Getting-started articles: