Move Zone to new location on the same disk
 Updated
This article describes how to move a Zone folder to a new location on the same physical disk by using the Diode App "Location on Disk" setting.
These instructions assume that you've already installed the Diode App and that you have multiple Zones with folders within the Zones. If you do not know how to create a Zone, follow this tutorial.
Sometimes you will want to locate your folders elsewhere on the system. This is convenient when wanting to specifically collaborate on subfolders within an existing folder structure, when wanting to use a larger storage device, and/or when wanting to use removable storage.
You can specify a different location either when first adding a Zone, or you can move it later on.
- Navigate to Zone Settings within a Zone
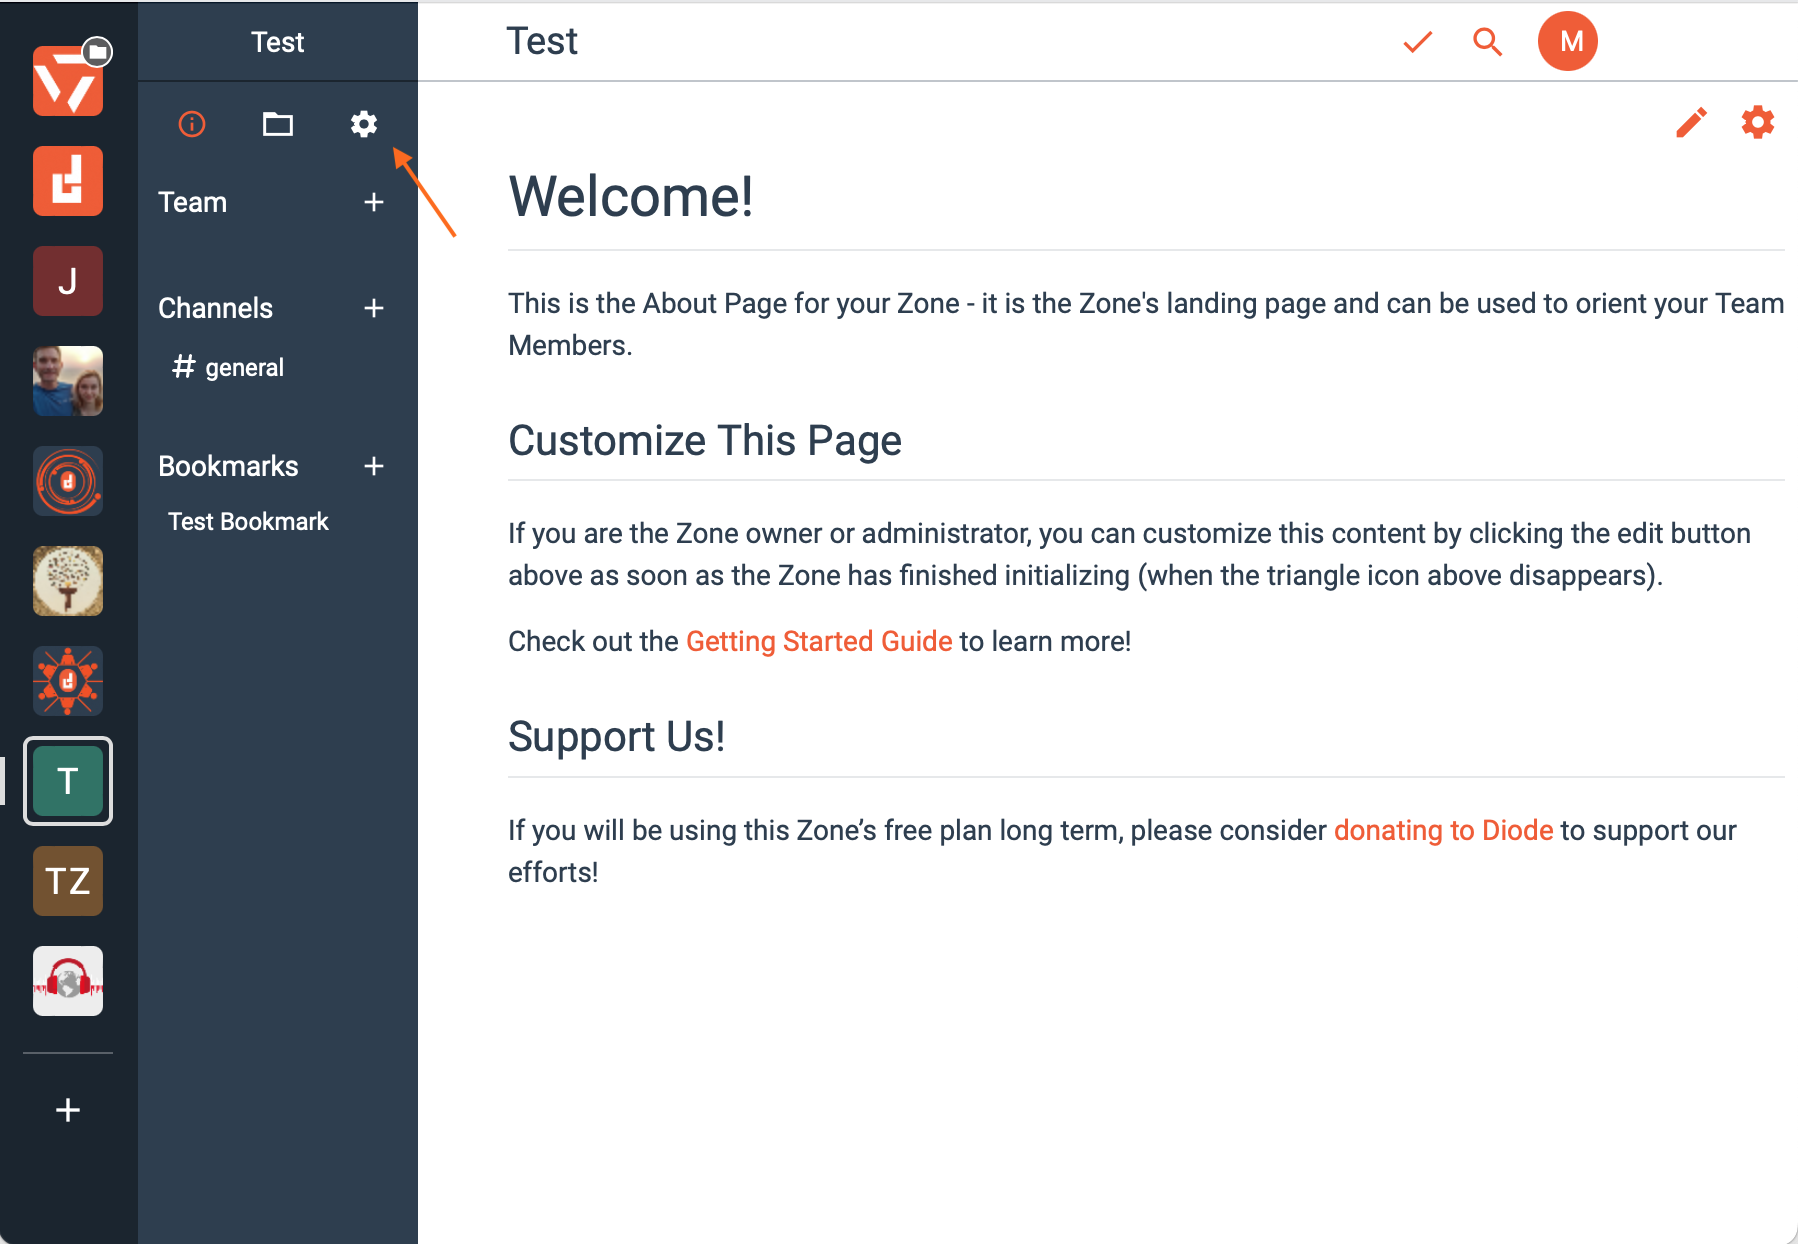
After opening Diode Drive and selecting a zone with that already contains a folder, select the zone settings icon in the upper right side of the page, as seen below.
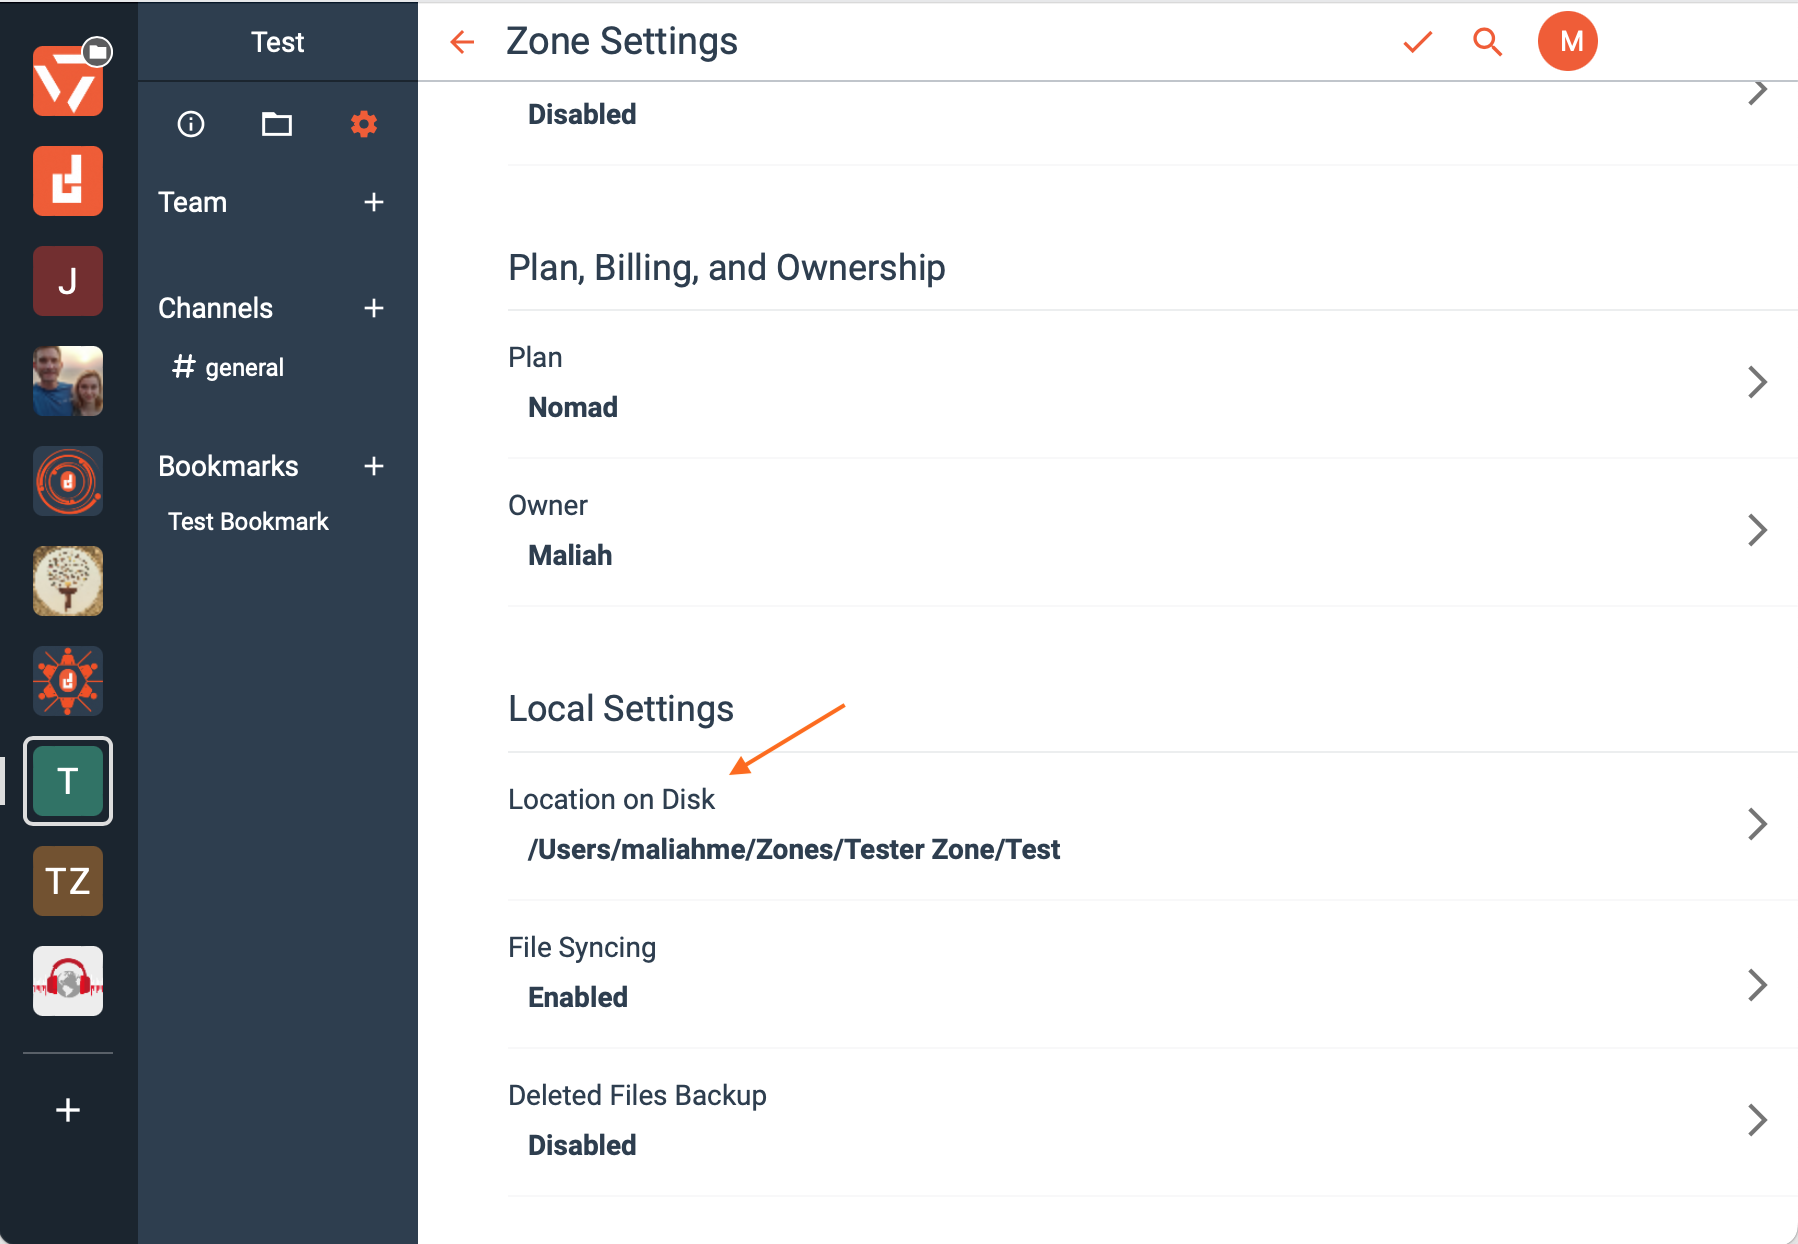
- Find "Local Settings" within your Zone's settings and "Select Location on Disk."
Within the zone settings, scroll down until you reach the location on disk option. Select this tab.
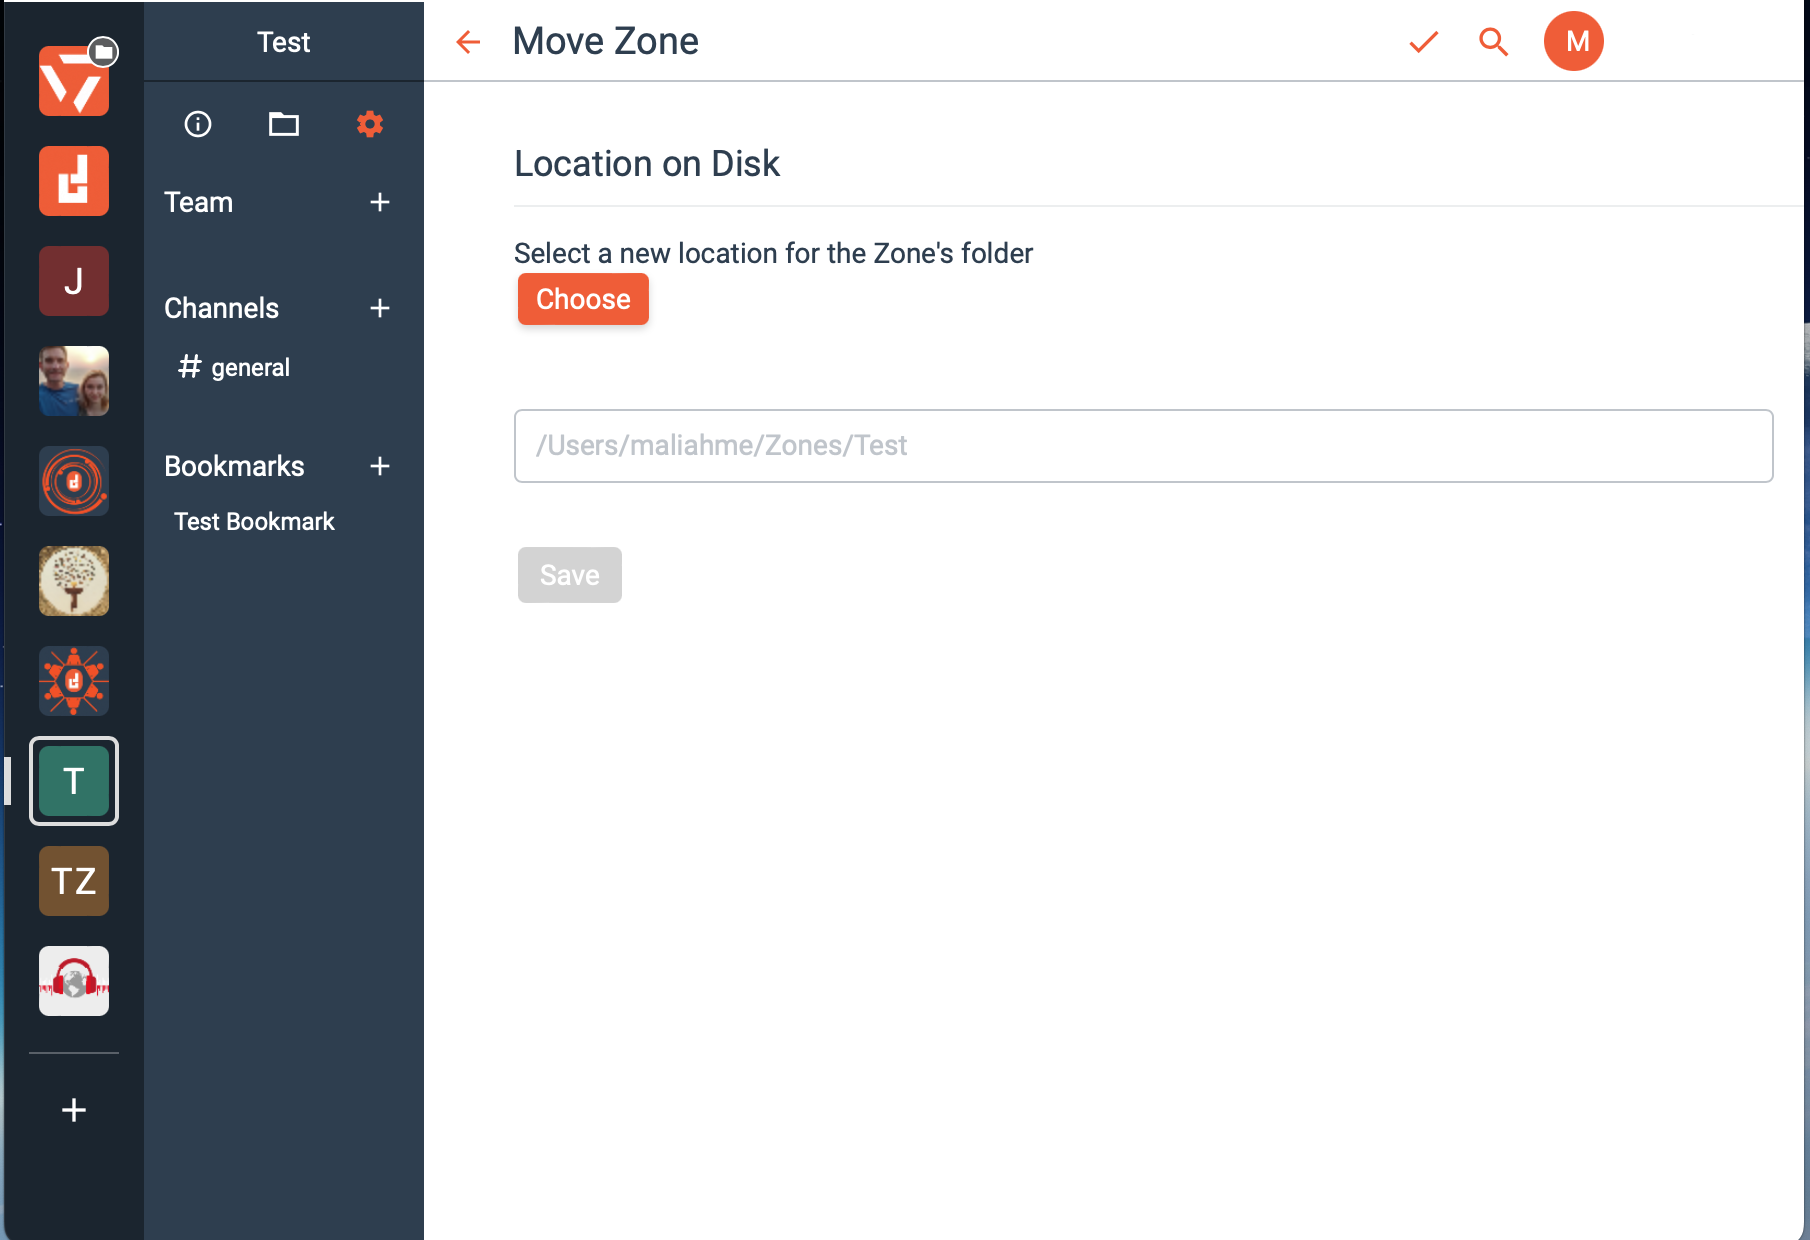
- Select the "Choose" button under "Location on Disk."
Under Location on Disk select the orange choose button to change the location from the location listed directly underneath the button.
- Select a new location within your device.
In this case, you are moving a file into a new Zone, so select the "Zone" location.
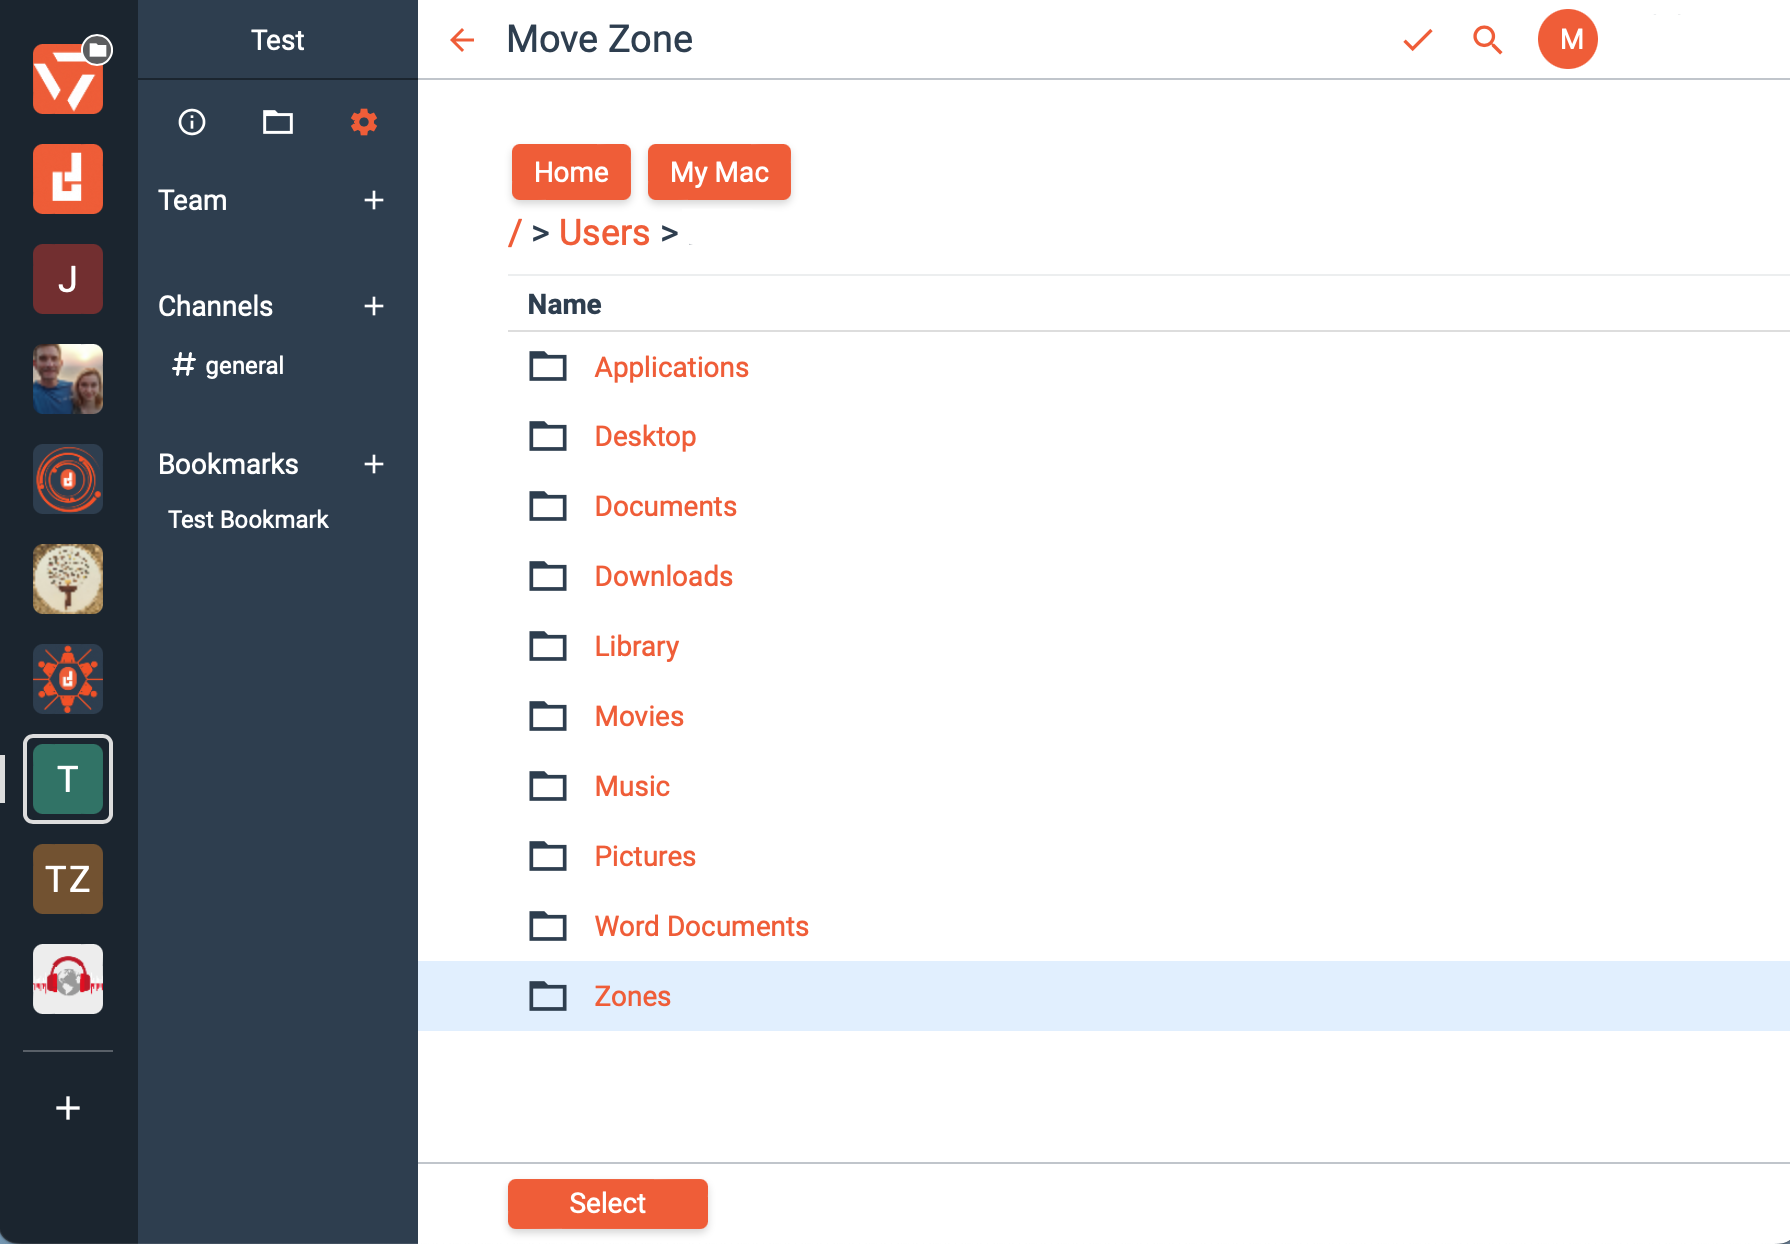
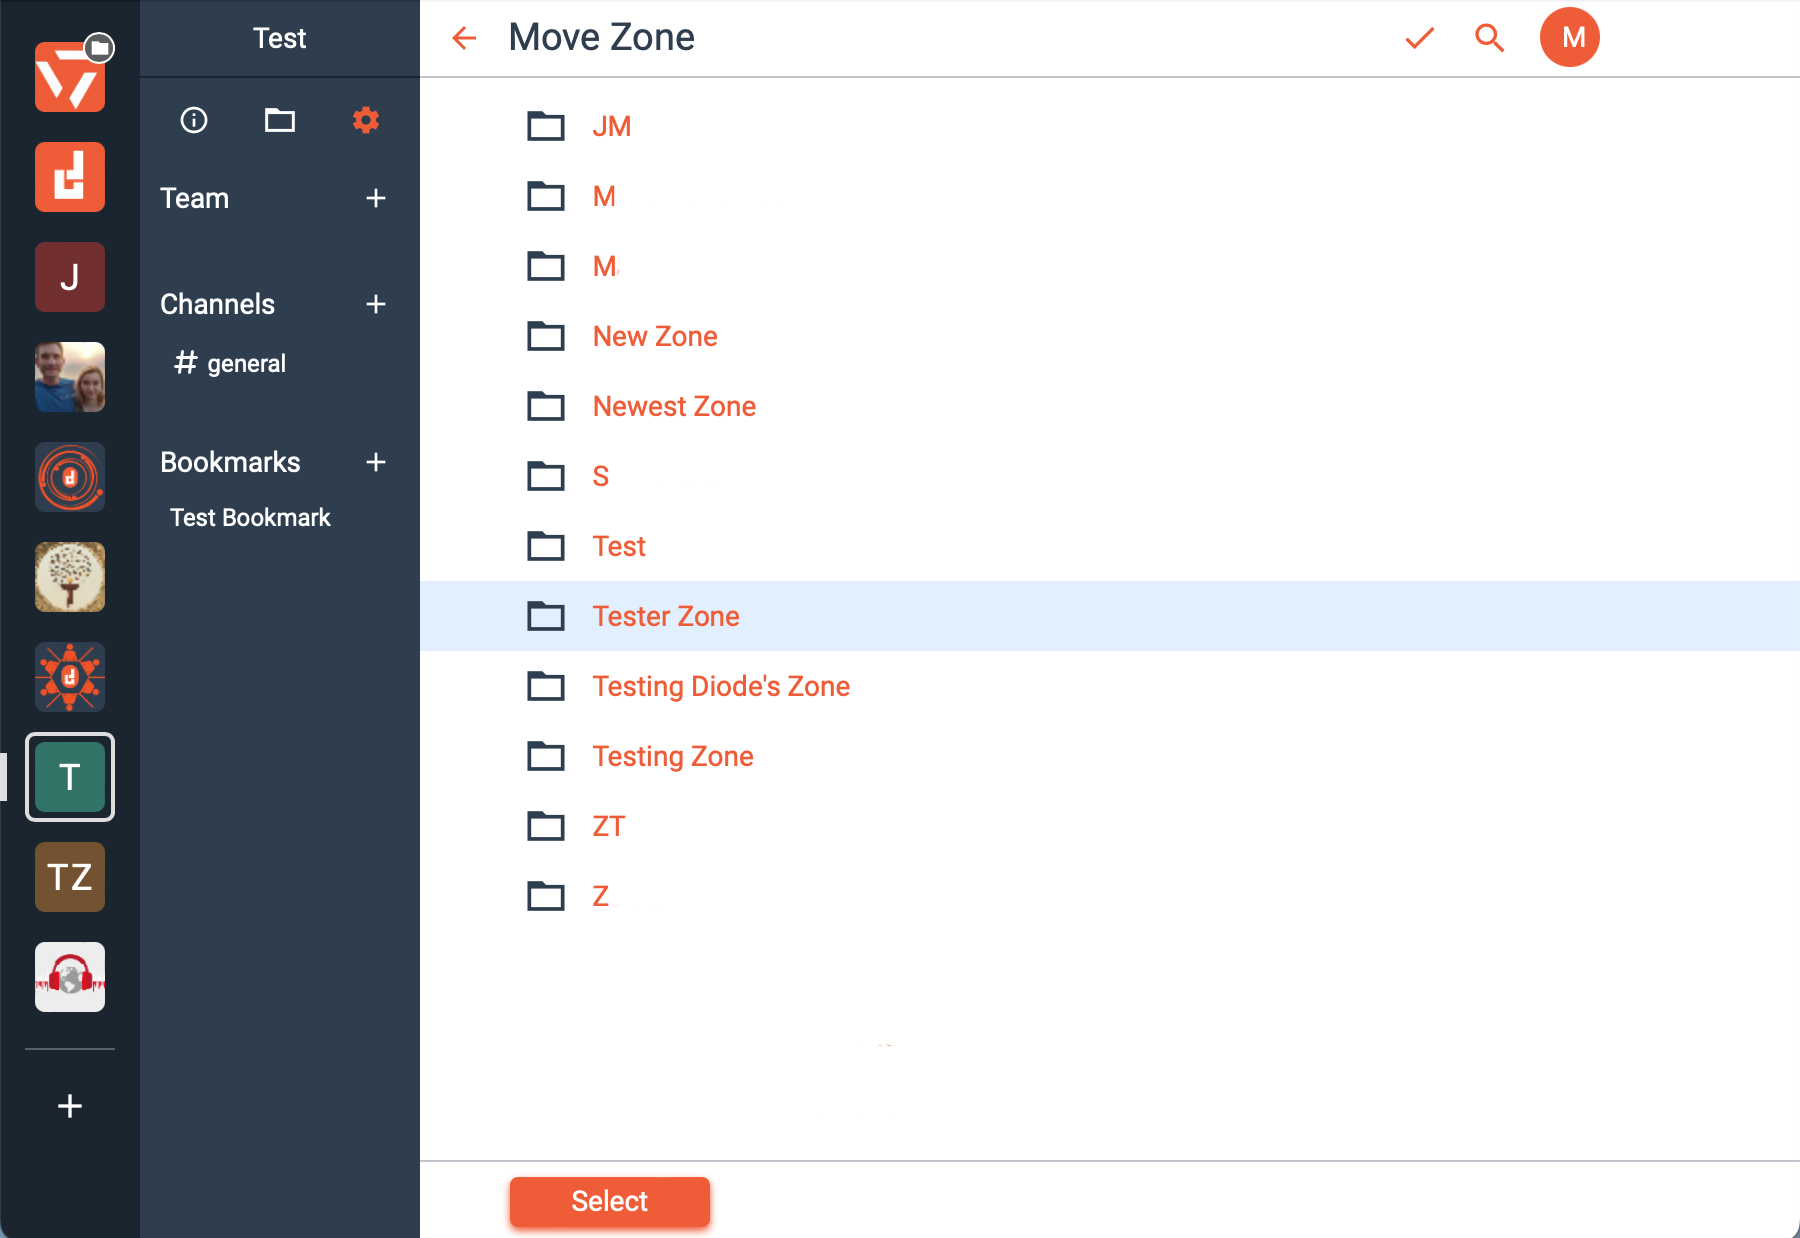
- You will now be in an area showing all of your Zones, choose the Zone you want to move your file to and click "Select."
In this case, the selected file is being moved from a Zone named "Tester" into another Zone named "Tester Zone."
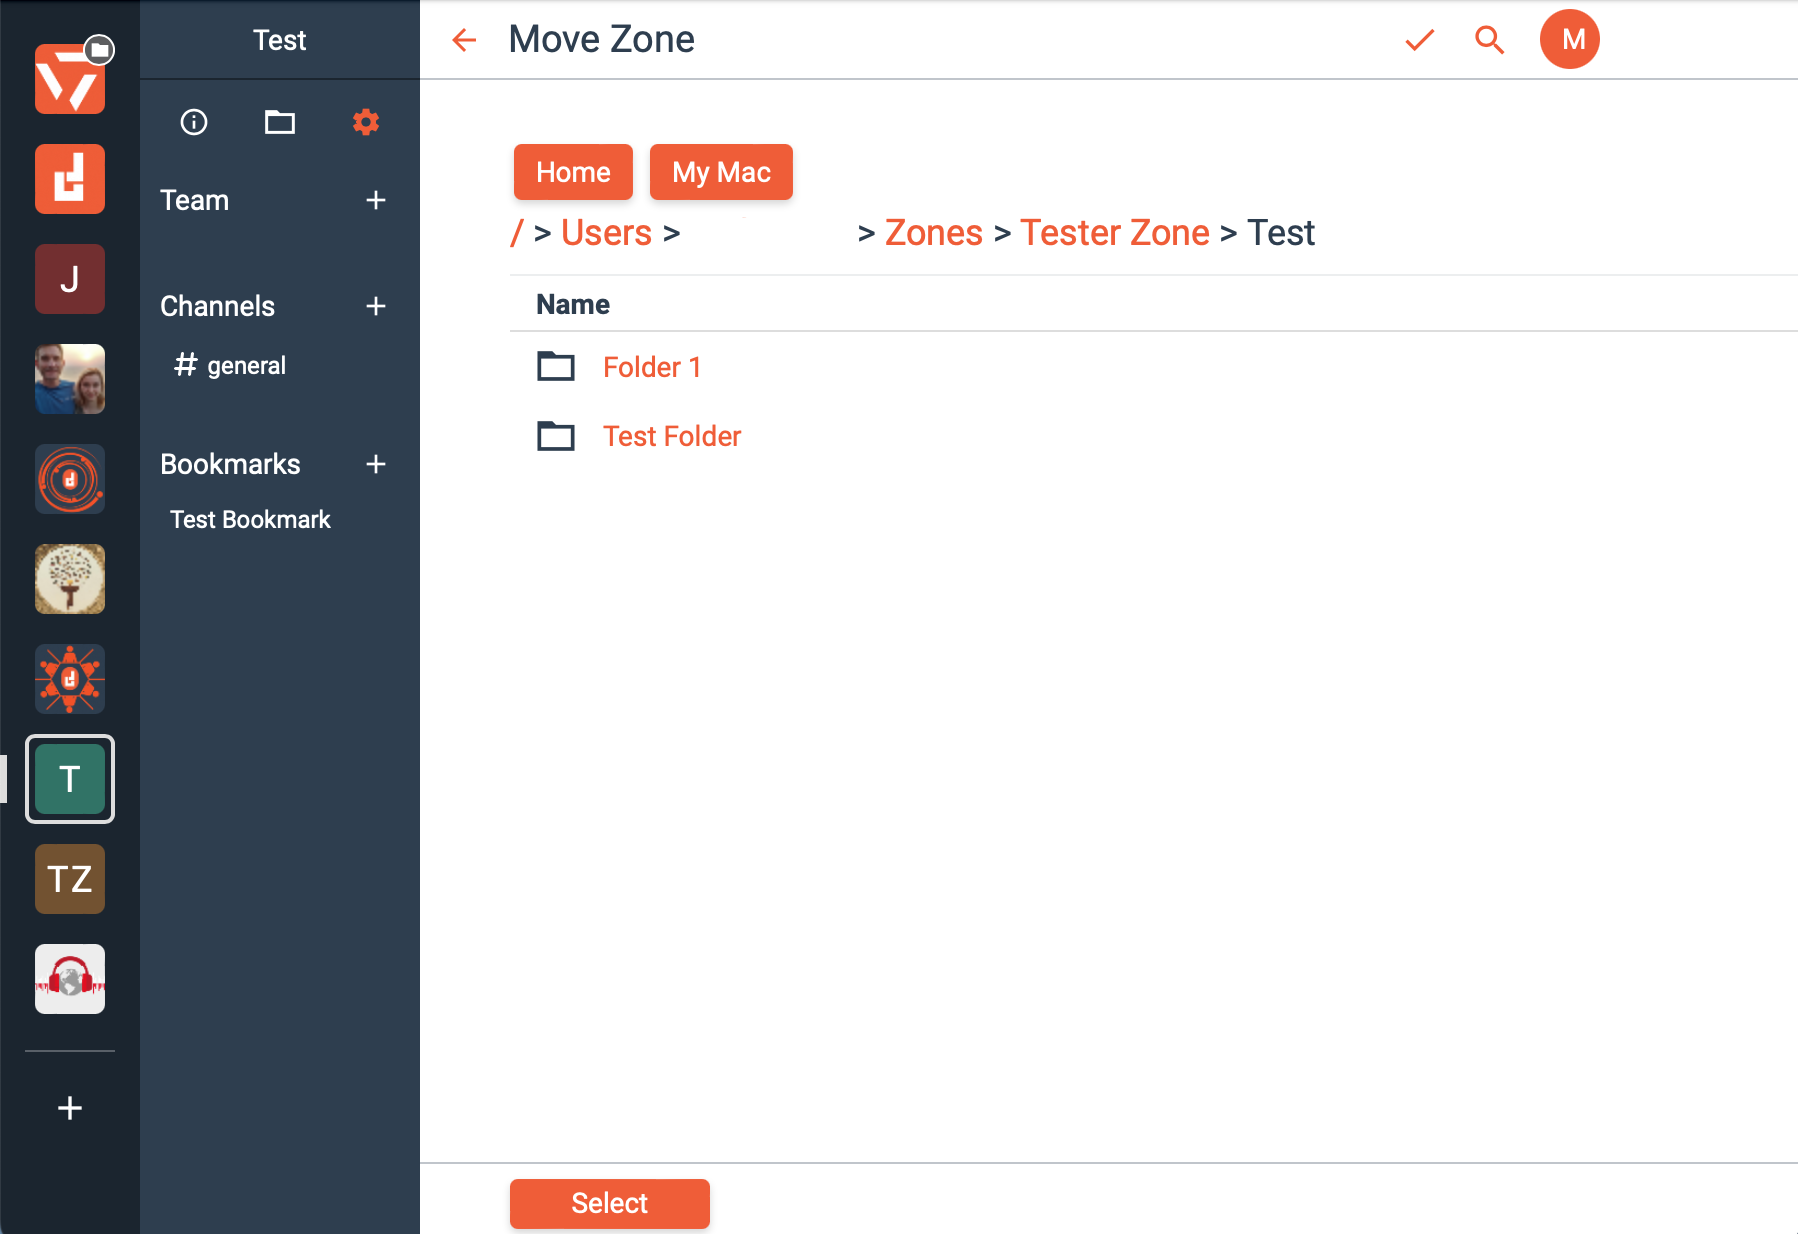
- You can now choose which Folder or File within your Zone you would like to move. Click "Select" when done.
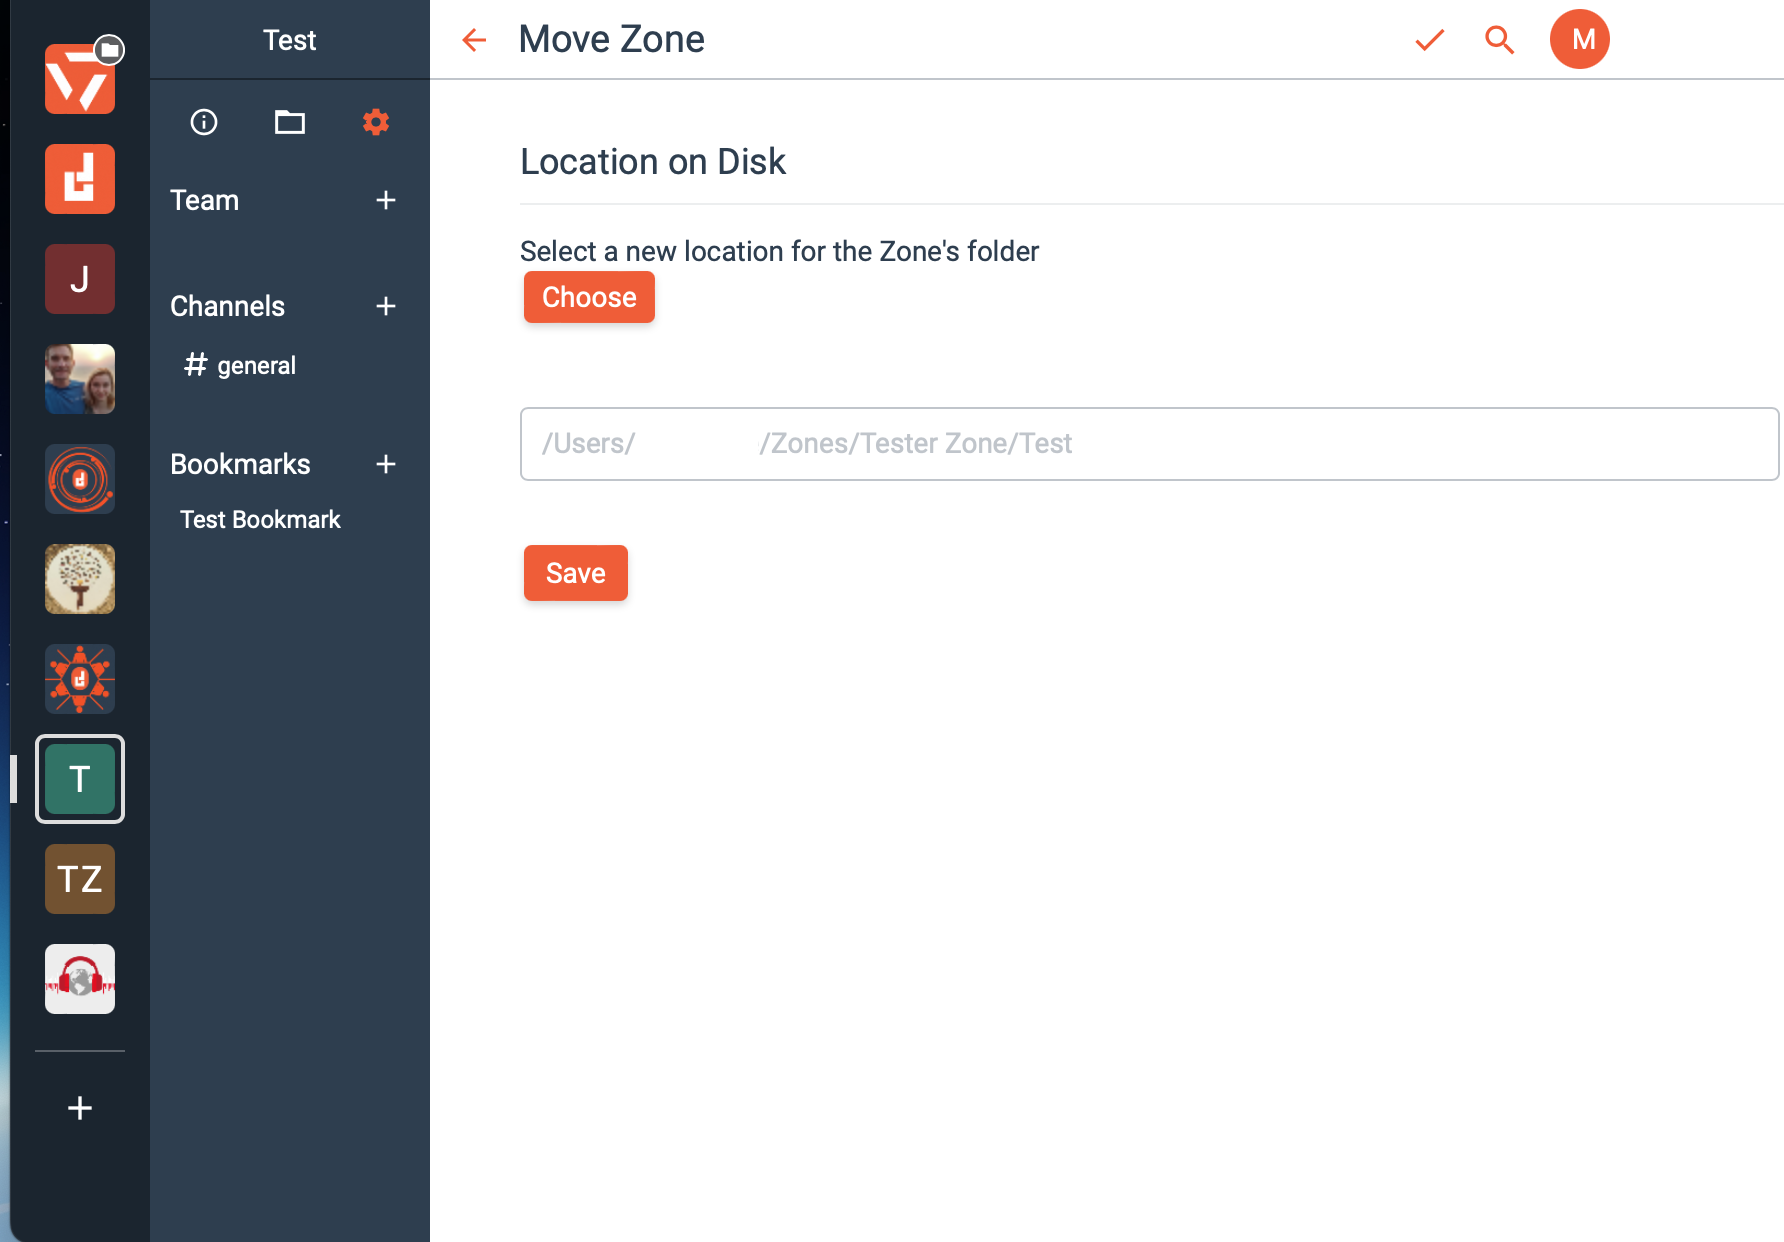
- It will direct you back to "Location on Disk" where you can click "Save" to save your changes.
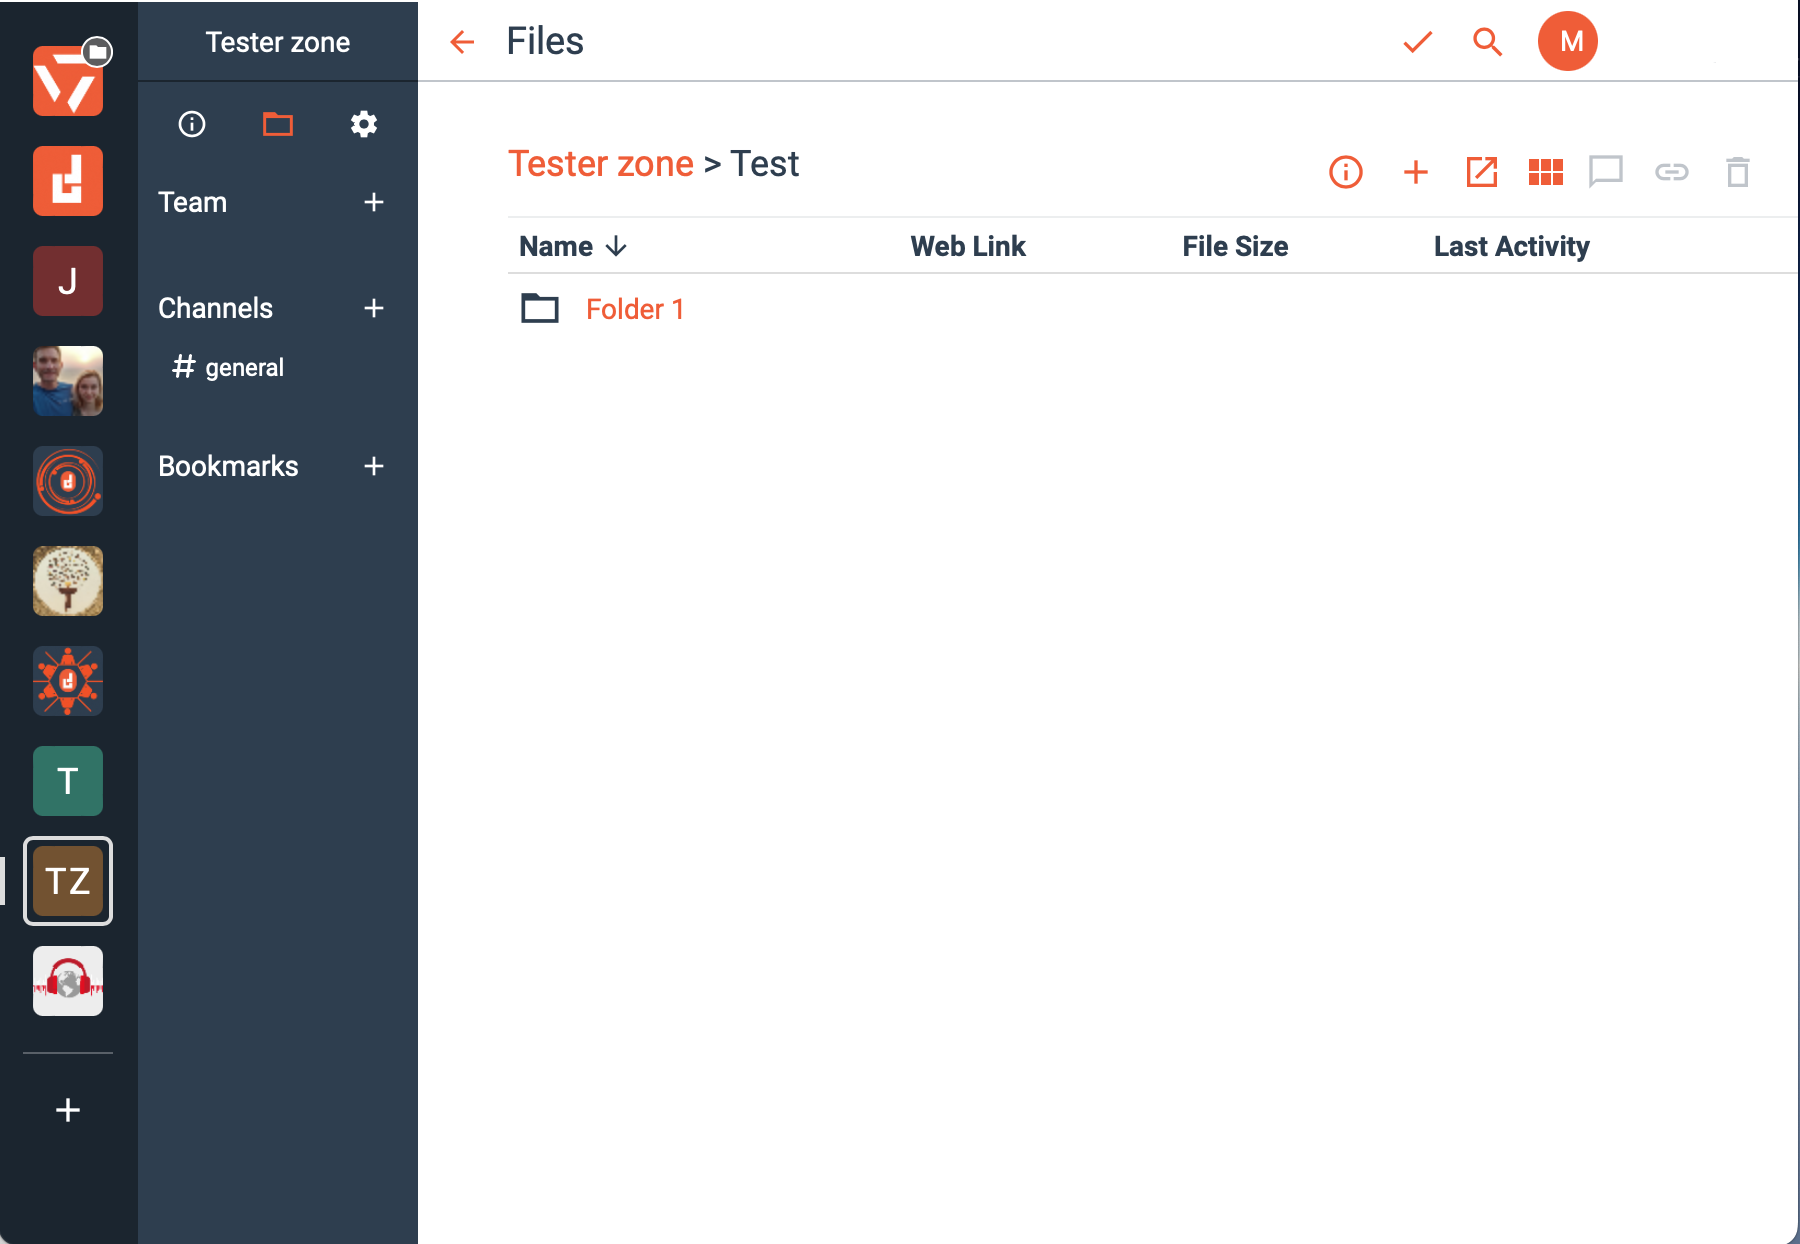
That's it! You have successfully relocated your folder to a different zone. The folder will also now appear in your newly designated zone. The file will no longer be in the previous Zone.
If you want to move a file to a different disk, please see this IT admin article.