Configure a Custom Domain
 Updated
Diode can be used to host content on a custom web2 Top Level Domain (TLD) - similar to github pages. This enables exciting possibilities of edge hosting for websites and other TLD-centric content.
For example, if you've registered a domain "yourname.com", you can host a website on "yourname.com" that is served from your diode client (e.g. from a Raspberry Pi, your laptop, or a server).
No static IP address or paid web host is required!
Important Note: Diode custom domains match the web2 name BEFORE the TLD suffix to the Diode BNS Name (web3 name). Example: yourname BNS entry matches yourname.com AND ALSO matches yourname.net (and every other yourname.<tld>). Therefore, it is "first come first serve" - the first yourname.<tld> web2 domain owner that registers yourname with Diode will be the operator of the web3 domain.
Preparation
- Verify the TLD for your customer domain is a two, three, or four letter TLD (e.g.
.comis a three letter TLD). - Register the domain name as a BNS name with Diode and set the "Destination" of your BNS name to the address of the diode client hosting the content. For example, if your web2 domain is yourname.com then register "yourname" on the diode chain.
Or just on the command line:diode bns -register yourname
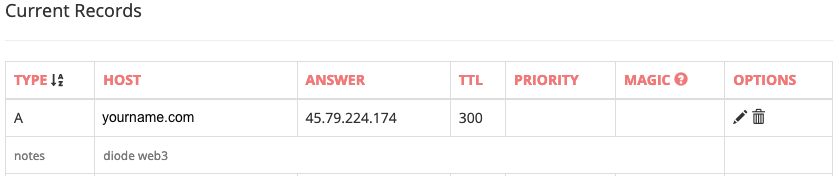
- Create an DNS A record to point your web2 domain to the IP address for diode.link (currently the IP is 45.79.224.174, but you can get the IP by opening a terminal window and typing
ping diode.link). To do this, you'll have to go to your DNS provider's website and edit the DNS records.
porkbun.com example:
That's it! It will take up to an hour for your DNS changes to apply. So, don't forget to bring up your website and start serving your decentralized web!
In the example of yourname.com, you should be able to see your content at the URLS:
https://<clientaddress>.diode.link
http://yourname.diode.link
http://yourname.com