Reserve a Domain Name
 Updated
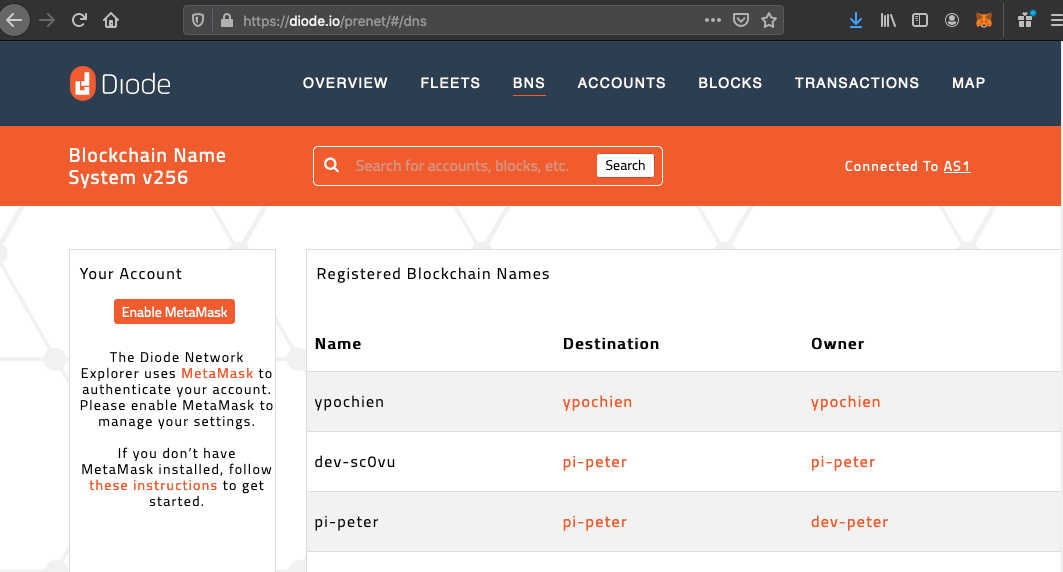
Addresses on the Diode Network use the same format as Ethereum public addresses - while excellent for unique identification, they are not particularly memorable to humans. The Diode Network has a Blockchain Name System (BNS) - a decentralized smart-contract based Domain Name System - that allows the association of a human recognizable name with a Diode Network address. If a BNS name is configured for an address, it can be used in place of the address.
For example, this can be used to shorten the address used to view the public video feed of Diode's Berlin office from: https://0xc206E1255Cbace8ba904DaA259D7a5b7F90E2D50.diode.link to https://betahaus-berlin.diode.link.
To view BNS names that have been registered on the Diode Network, visit the BNS page of the Diode Network Explorer.
Have fun with this, and let use know in our telegram channel if you have any feature requests!
Reserve a BNS Name via the Diode Network Explorer
Often, configuring a BNS Name is a significant event - you may want to manage the names, and where they point to, over time like you would a ICANN domain name.
To do this, we recommend using the Diode Network Explorer via a web browser with MetaMask installed.
- Go to the BNS page on the Diode Network Explorer (DNE)
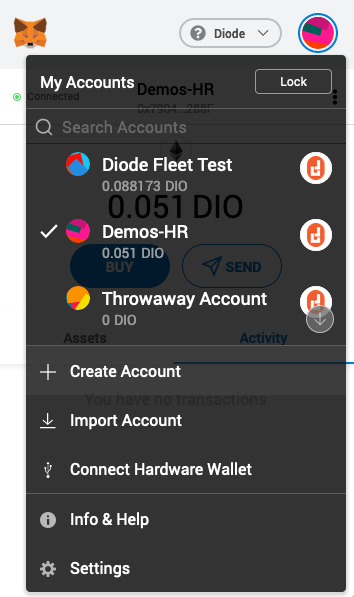
- Unlock MetaMask, click the colorful Account selector and click "Create Account" and enter a name for your account - we'll name the account "My BNS Names" (we are creating a new account that is specifically made to "own" the BNS names you'll reserve).
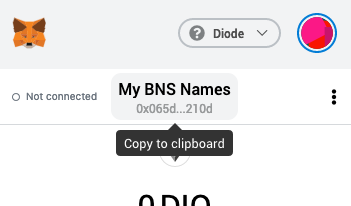
- Once the account is created, click the Account Name ("My BNS Names") to copy the public address to the clipboard - we'll use this in step 6
- If you refresh the BNS page, you'll now see that it is authenticated to your new account, and the account Name is showing up as your Account's address. The friendly name you entered in MetaMask ("My BNS Names") is only visible in your installation of MetaMask - the Diode Network does not know about it.
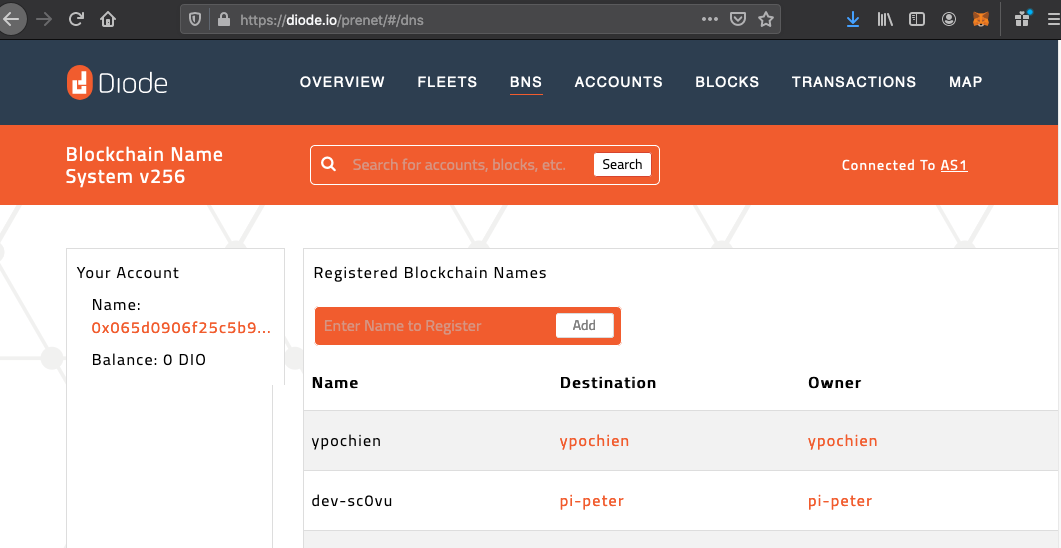
- In order to give your account a friendly name that is publicly visible and persistent, enter it in the "Enter Name to Register" box and click Add
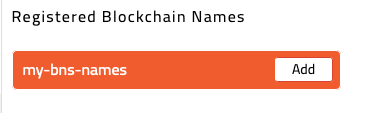
- A new row is added to the bottom of the BNS name table - go to it and paste the public address for your account from step 3, and click Update.

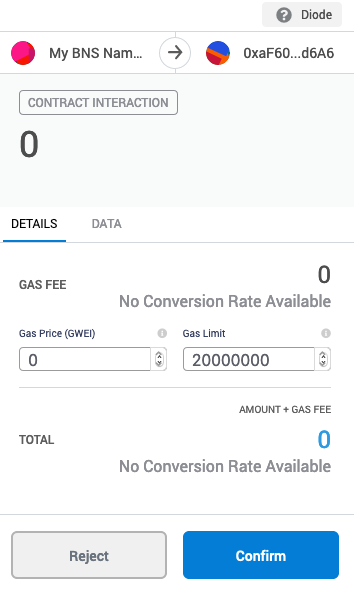
- A MetaMask confirmation window will pop up, asking you to confirm the transaction - click Confirm. After waiting for a few seconds, MetaMask should alert you that the transaction has been confirmed - your BNS name is now registered!
- If you want to change the account the name is registered to at any time in the future, you can go to its entry and "Update" the address (you must be connected via MetaMask with the My BNS Names account to do so!)

- Now that you have your "master" account named and registered, you can use it to add and manage additional BNS entries for websites, web services, storage services, video streams, VPN connections, and more.
Reserve a BNS Name via the Diode CLI
Sometimes, you just want to create a name from the command line during development without using MetaMask or worrying about how to manage the name later.
In this case, you can use the use the Diode Client itself to reserve and link via:
diode bns -register my-example-name
You can also assign a name to an address via:
diode bns -register my-example-name=<client_address>
IMPORTANT NOTE: Using the Diode Client to register the BNS name binds the the name to your Client's local wallet. Ensure you keep a backup of your wallet file so you won’t lose access to the name!
If you want one location to manage all your BNS names, use the Diode Network Explorer method above (you can use a MetaMask wallet, or hardware wallet, to manage all your BNS names).
Once you've created your BNS name and linked it to your Client address, your Client's content will now be publicly available at https://my-example-name.diode.link.